Schedule a 30-min Call with Our Expert
Grab Your Free Gift...
This free guide uncovers 17 secrets that no Profile Projector manufacturer would dare tell you. You will receive this guide post your call with our expert.
High-quality profile projectors at best prices in India! Measure small parts accurately & achieve precision in every component!
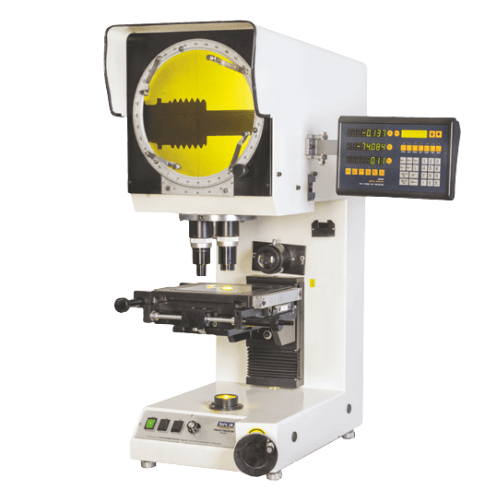
Sipcon is a leading Profile Projector manufacturer and supplier in India. We specialize in crafting high-quality profile projector for precise measurement and inspection needs. Sipcon's profile projector offers reliability and accuracy, providing excellent value for your investment.
Contact us for competitive profile projectors prices and elevate your quality control processes with our top-notch Profile Projectors or Optical Comparator.
Sipcon offers high-quality and trustable Profile Projectors with DRO for precise measurement. The instrument is indispensable for inspection in the relative factories.
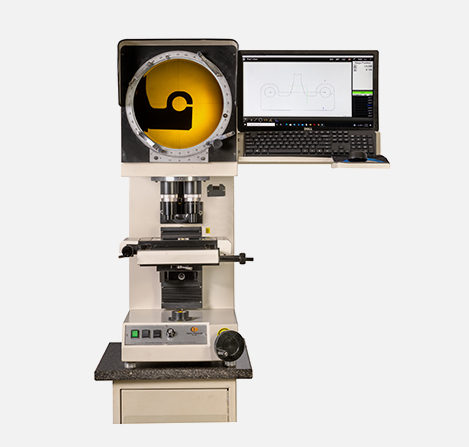
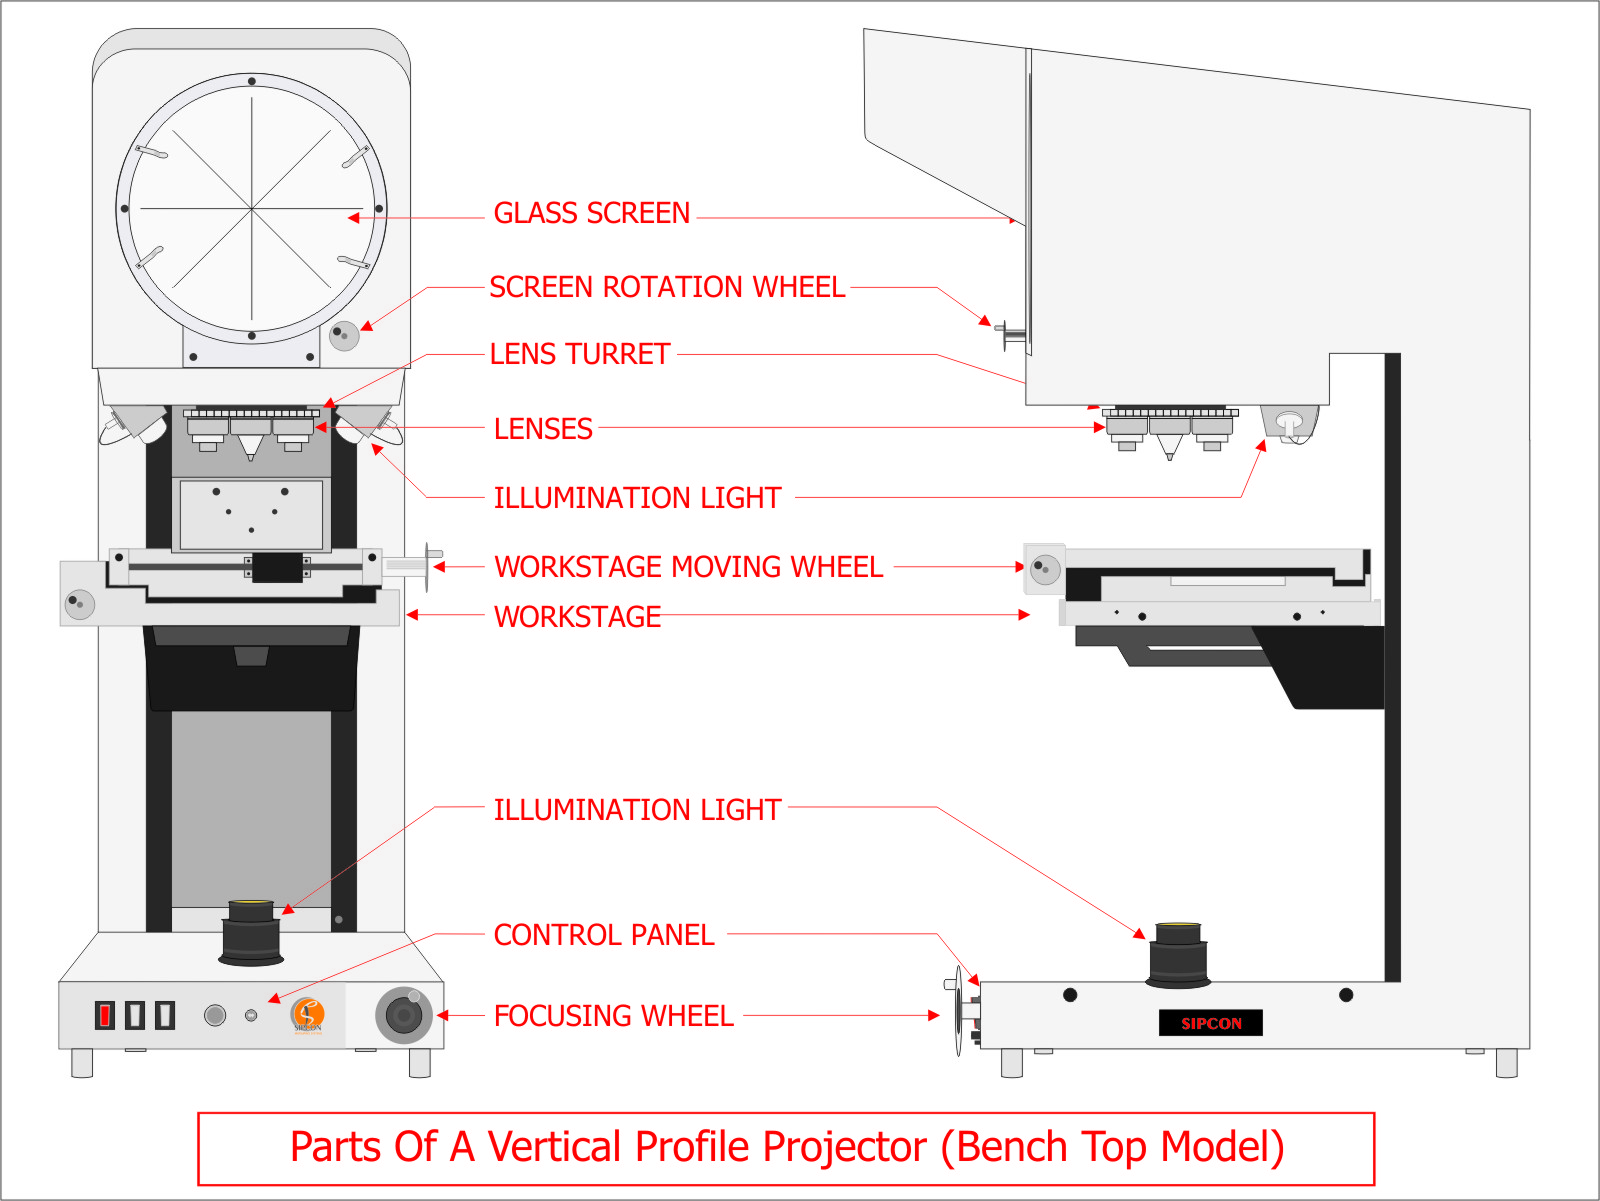
Vertical profile projectors are perfect for precision measurement of flat parts using a vertical optical system.
Get A Quote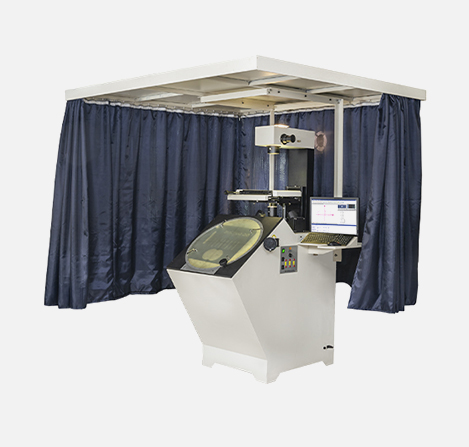
Shadowgraph profile projectors provide clear, magnified views of part profiles using shadow projection techniques.
Get A QuoteA Profile Projector also called an Optical Comparator or a Shadowgraph Projector is a specialized measuring system that is broadly classified under the category Industrial Metrology Systems. It is a versatile and indispensable measuring system in the manufacturing sector where small parts two-dimensional measurements are required in the R&D, Production, or Quality control departments. Automotive parts, plastic and rubber parts, wire and cable, biomedical equipment are some of the manufacturing industries which extensively use profile projectors for day-to-day measurements.
Profile projectors (optical comparatos) are important for checking rubber and plastic parts in manufacturing processes. They use special lenses and lights to measure the intricate shapes and dimensions of these parts accurately. With features like edge detection and digital readings they help make sure rubber and plastic pieces are the right size and don't have any mistakes. These machines work well for small or big parts helping factories make good quality rubber and plastic stuff.
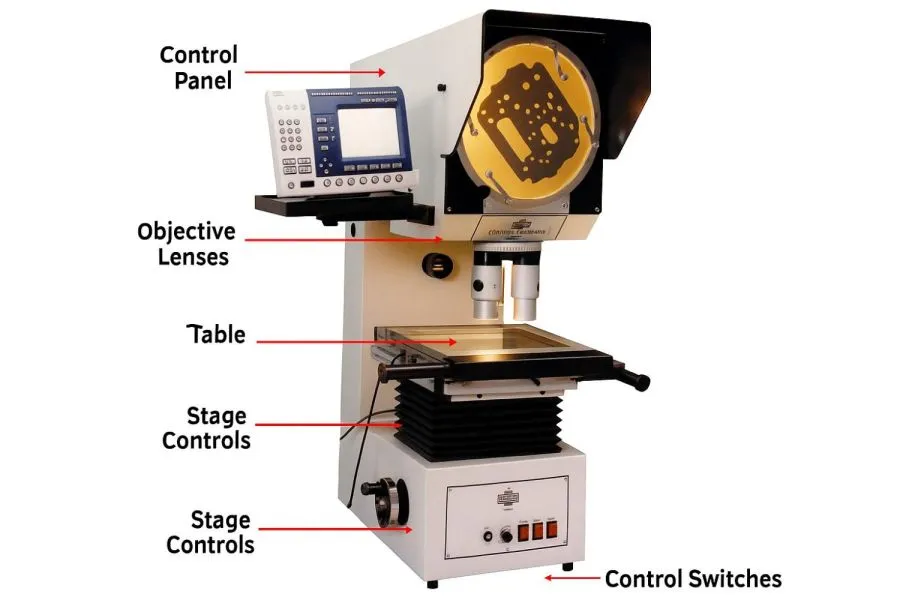
An Optical Profile Projector beautifully combines optics, mechanics, electronics, and software to provide small parts two-dimensional measurements.
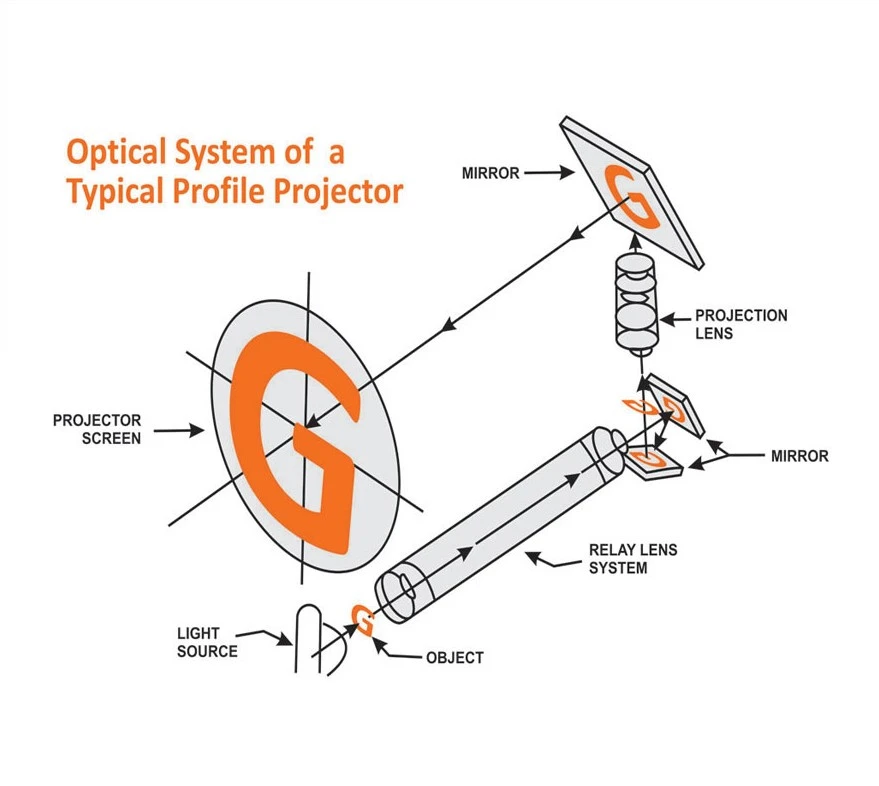
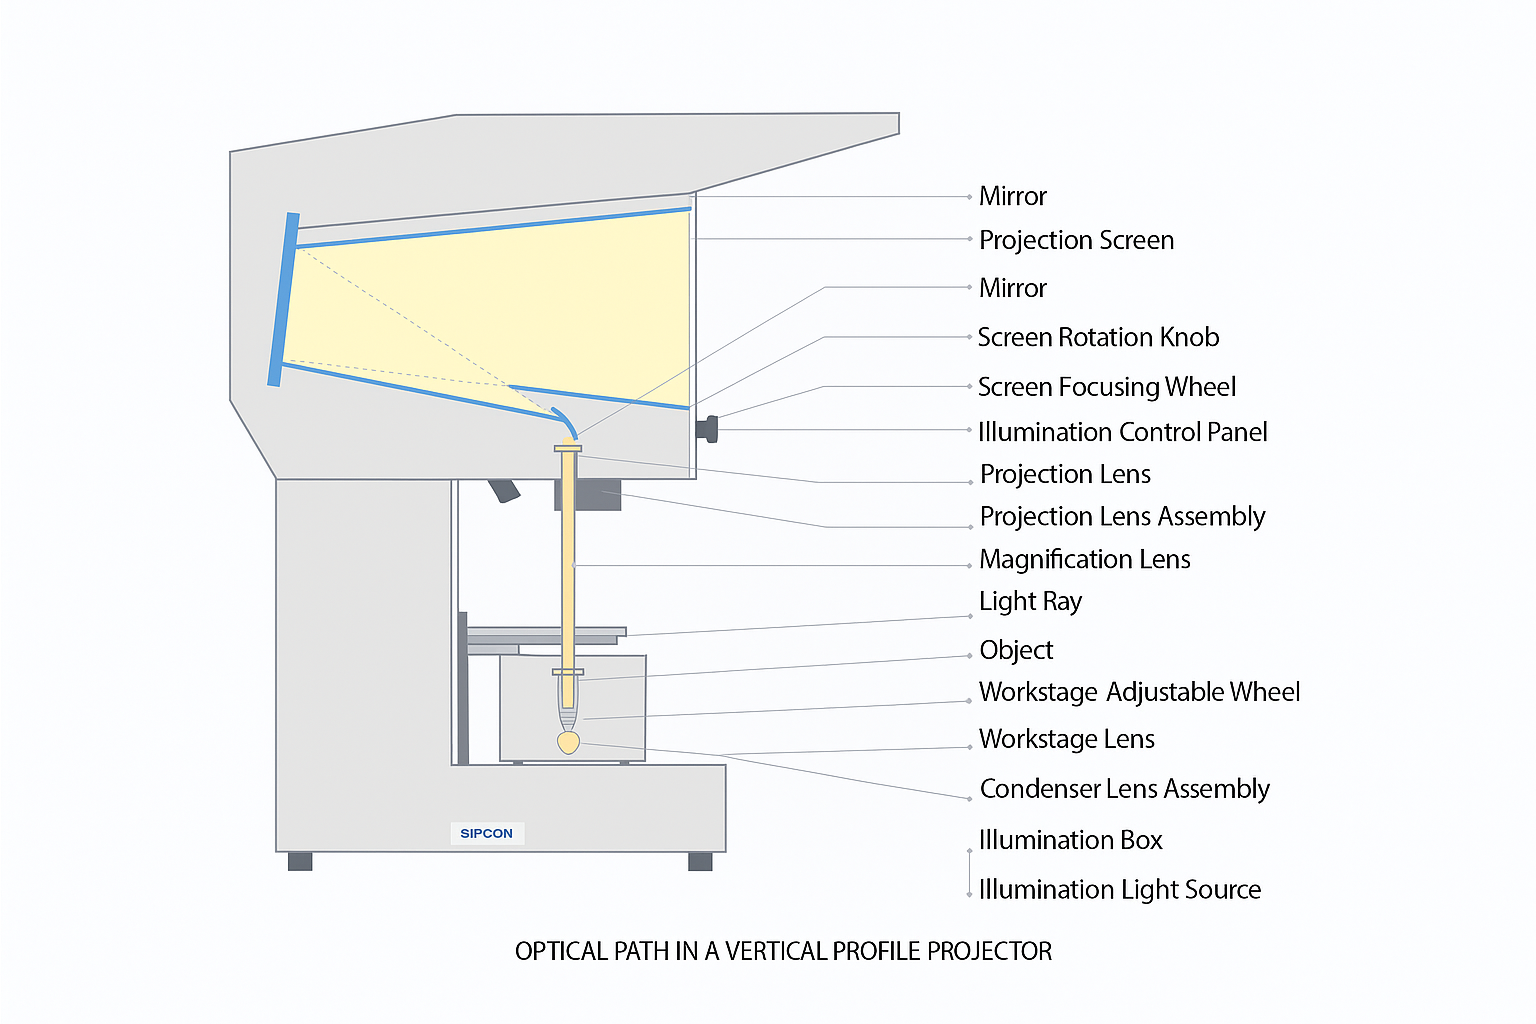
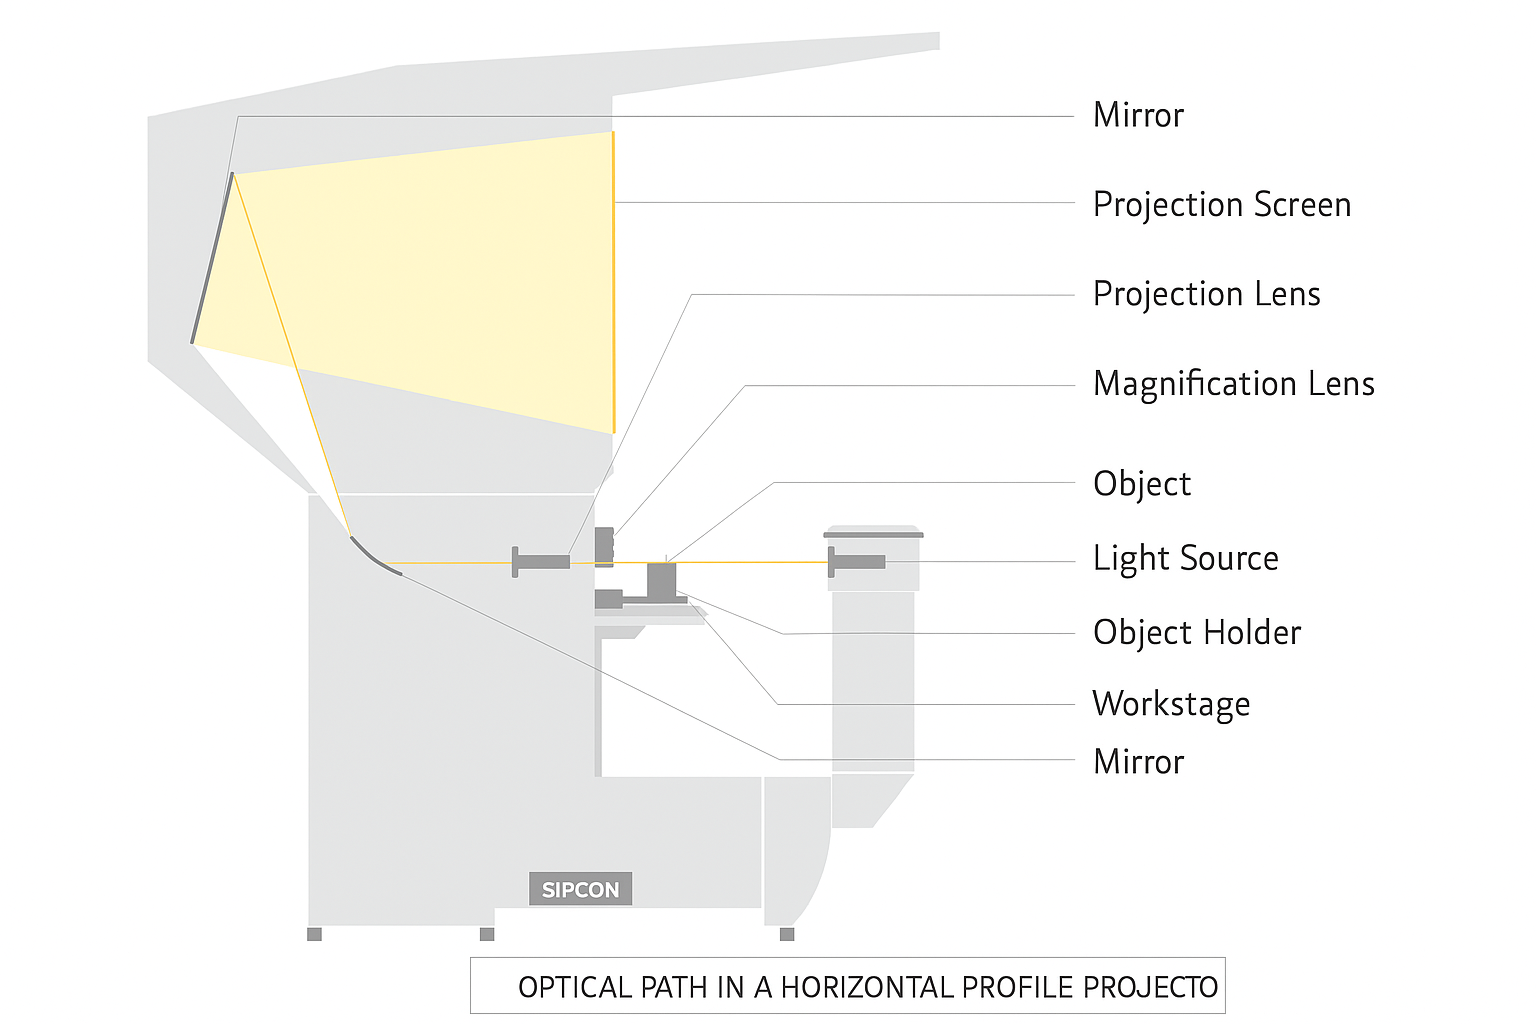
A beam of parallel light, produced by a tungsten or filament lamp (and with a large enough diameter to provide coverage of the test piece) along with a system of condensers, lenses, and mirrors is used to create and project a shadow of the test piece onto a built-in projection screen. The optical system magnifies the profile of the small part, making it easy to do measurements. Depending upon the light path Profile Projectors are further classified as Vertical Profile Projectors or Horizontal Profile Projectors.
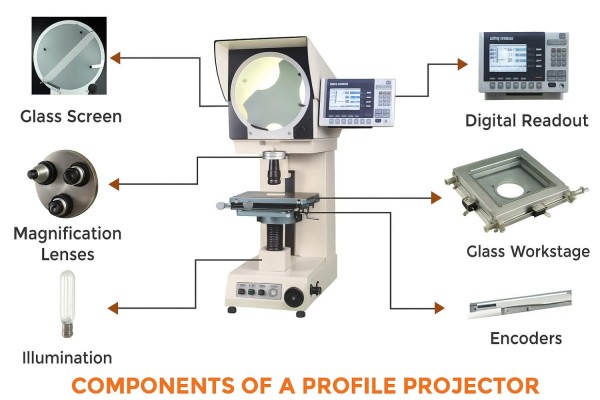
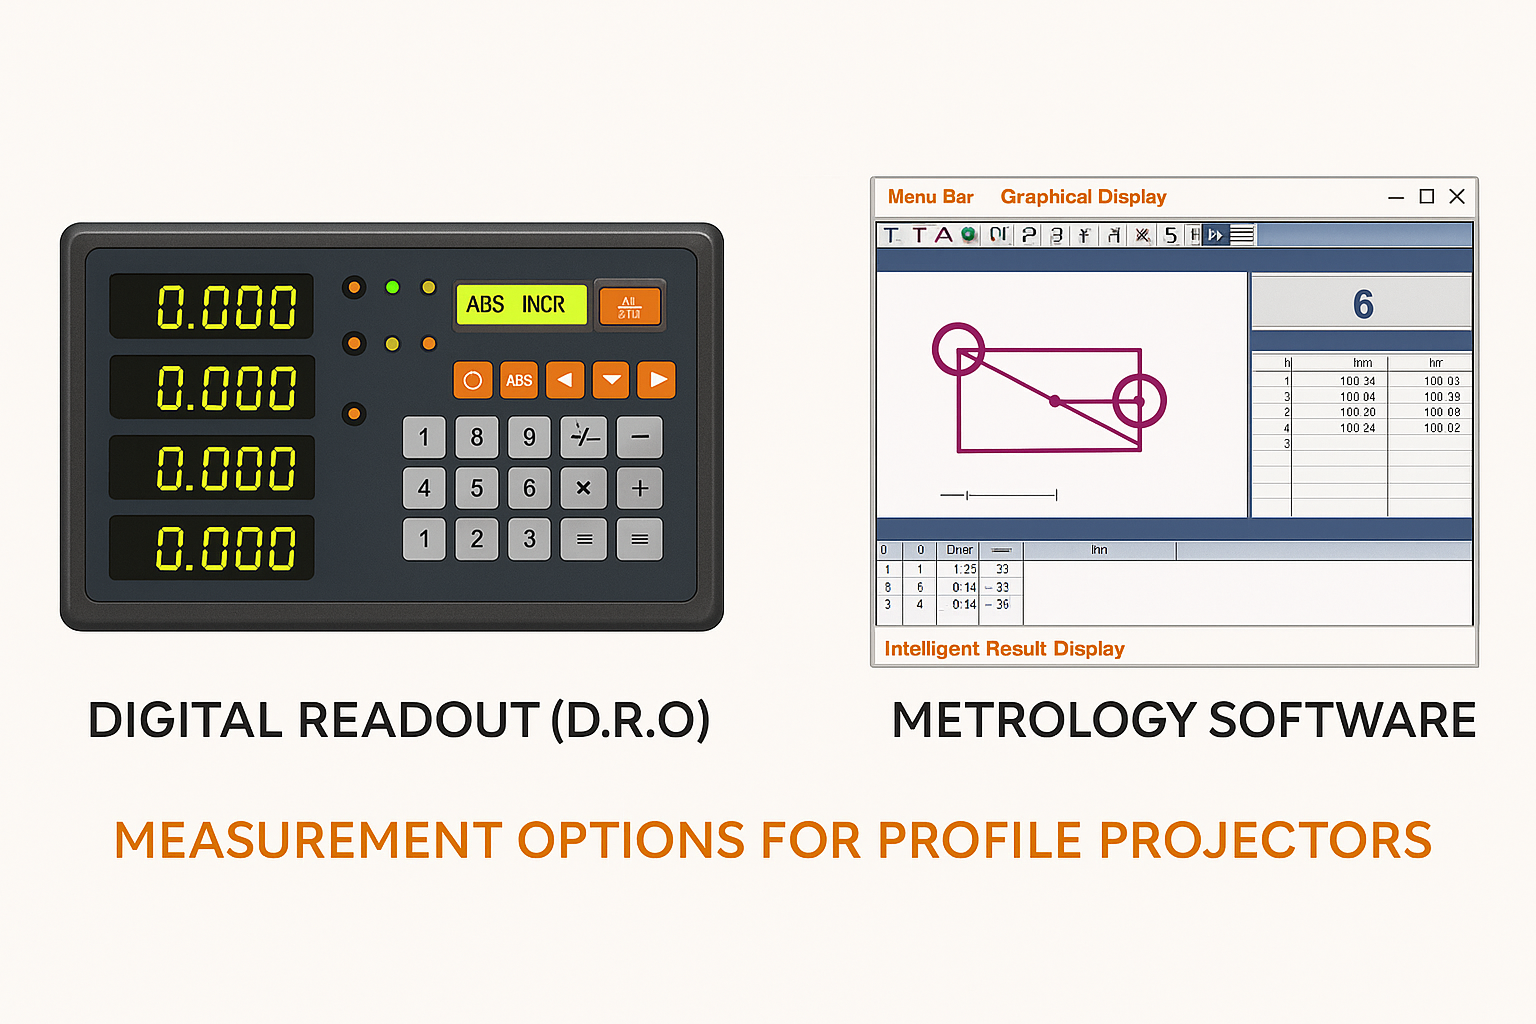
The built-in table on which the test piece is kept is called a work stage that can be moved in x-y directions and has integrated linear encoders to precisely measure the x-y movements which are then displayed on a digital read-out or a computer screen using metrology software.
The operators using their visual acuity and perceptiveness identify and mark a reference point on the shadow (screen has crosshair reference). They then move the work stage along the length of the shadow, the dimension of which is to be measured. Alternatively, they can identify and mark points, and the system automatically calculates the distance, angle, arc length, etc. of the shadow and consequently calculates the same for the part.
The evolution of Profile Projectors led to the invention of Vision Measuring Systems or a video Measuring Machine which uses a digital image of the part (instead of a shadow as in Profile Projectors) and automatic edge detection to do more precise and accurate measurements.
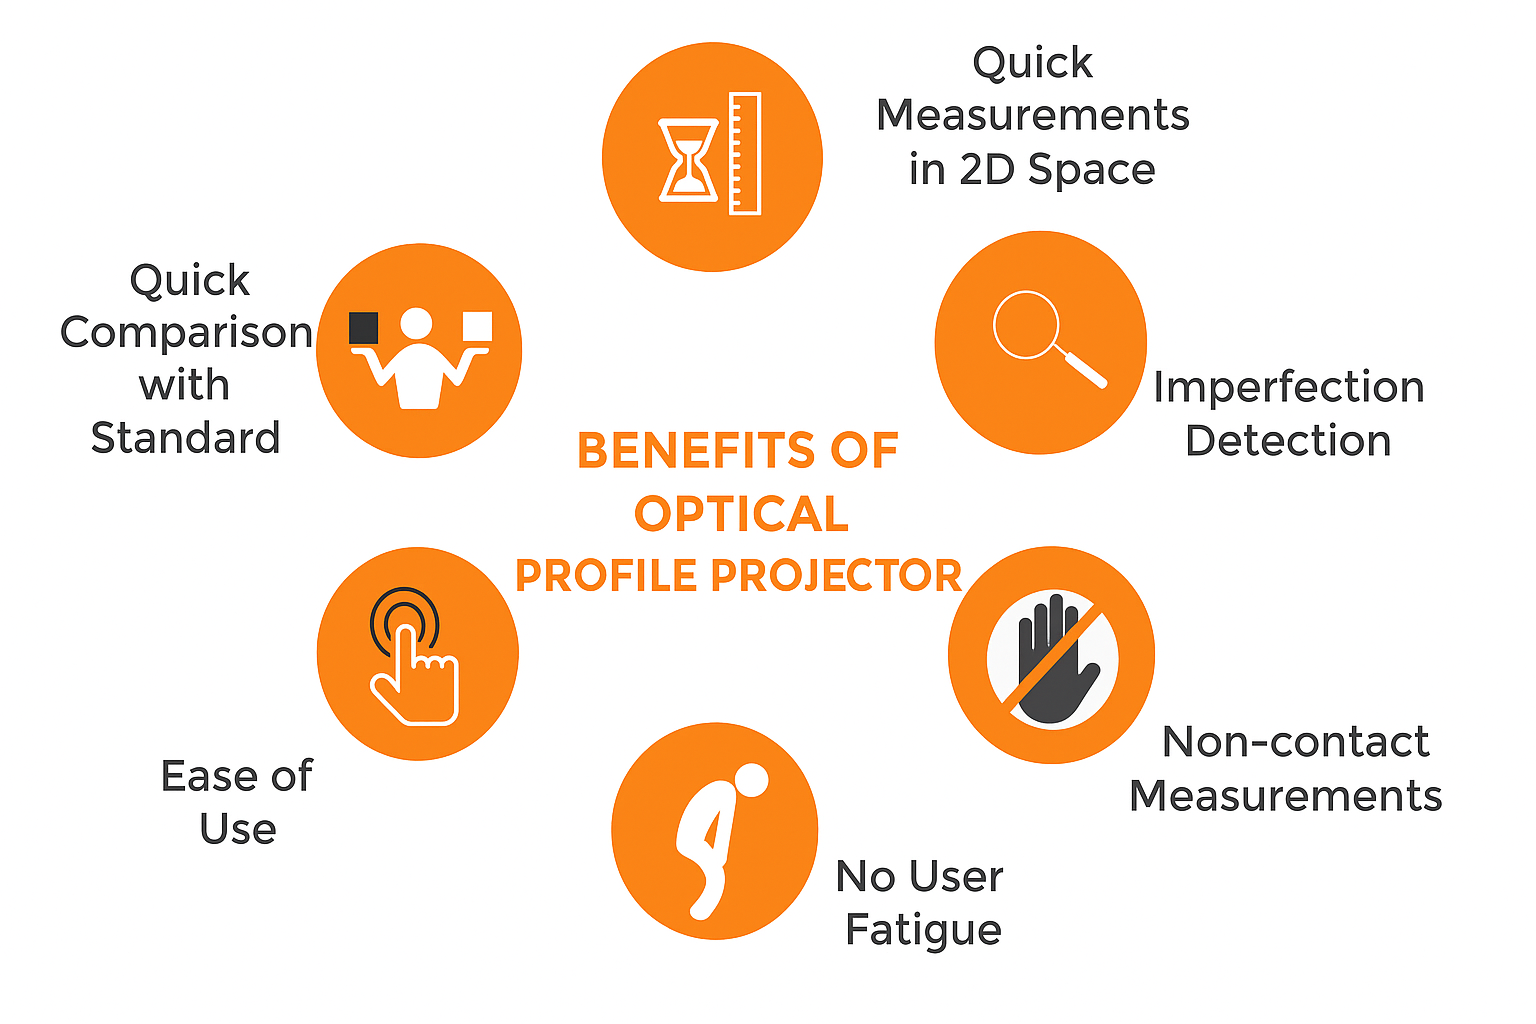
The benefits of the Profile Projector are precise, non-contact measurement of component profiles and easy visualization of complex shapes on a screen. It also facilitates cost-effective quality inspection of small, intricate parts in 2D measurement applications.
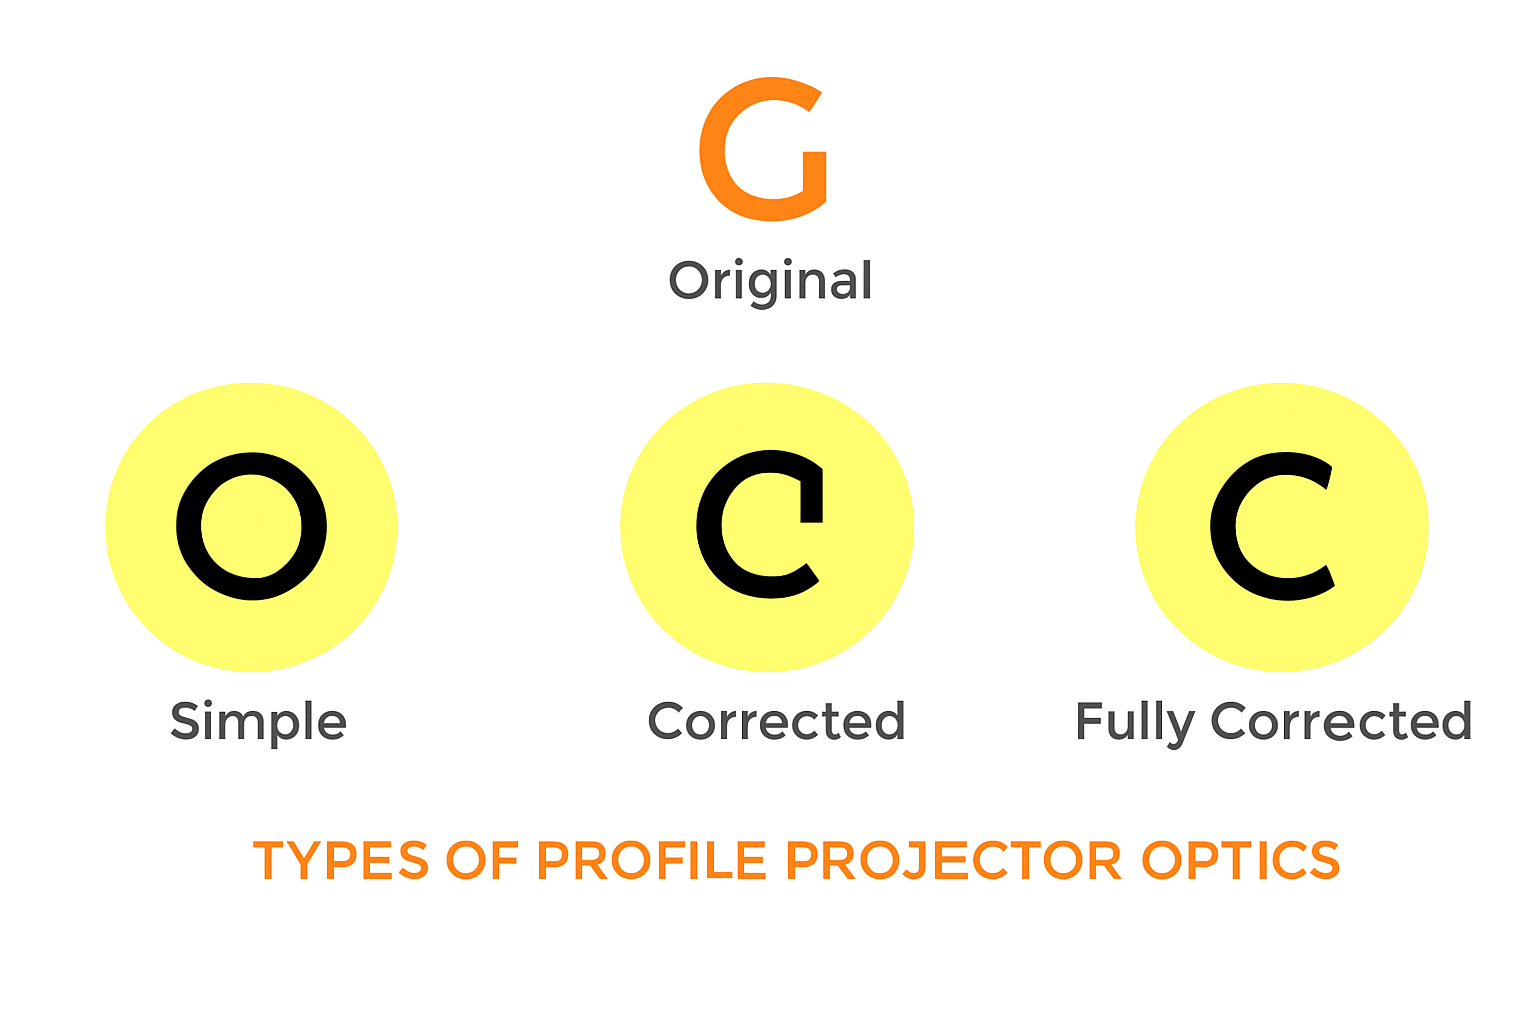
In simple optical systems, the image on the profile projector screen is both upsides down and reversed. For symmetrical parts, this system is best suited as there is no difference in both the horizontal and the vertical mirror images.
In corrected optics systems the images produced are unreversed, however, they are still upside down. This system is best suited for asymmetrical parts if it is important to know which side is being measured so that there is no confusion in the operator’s understanding of the measurements.
In Fully Corrected Systems the images displayed on the screen are both erect and unreversed, this makes measuring very convenient for even the inexperienced operators.
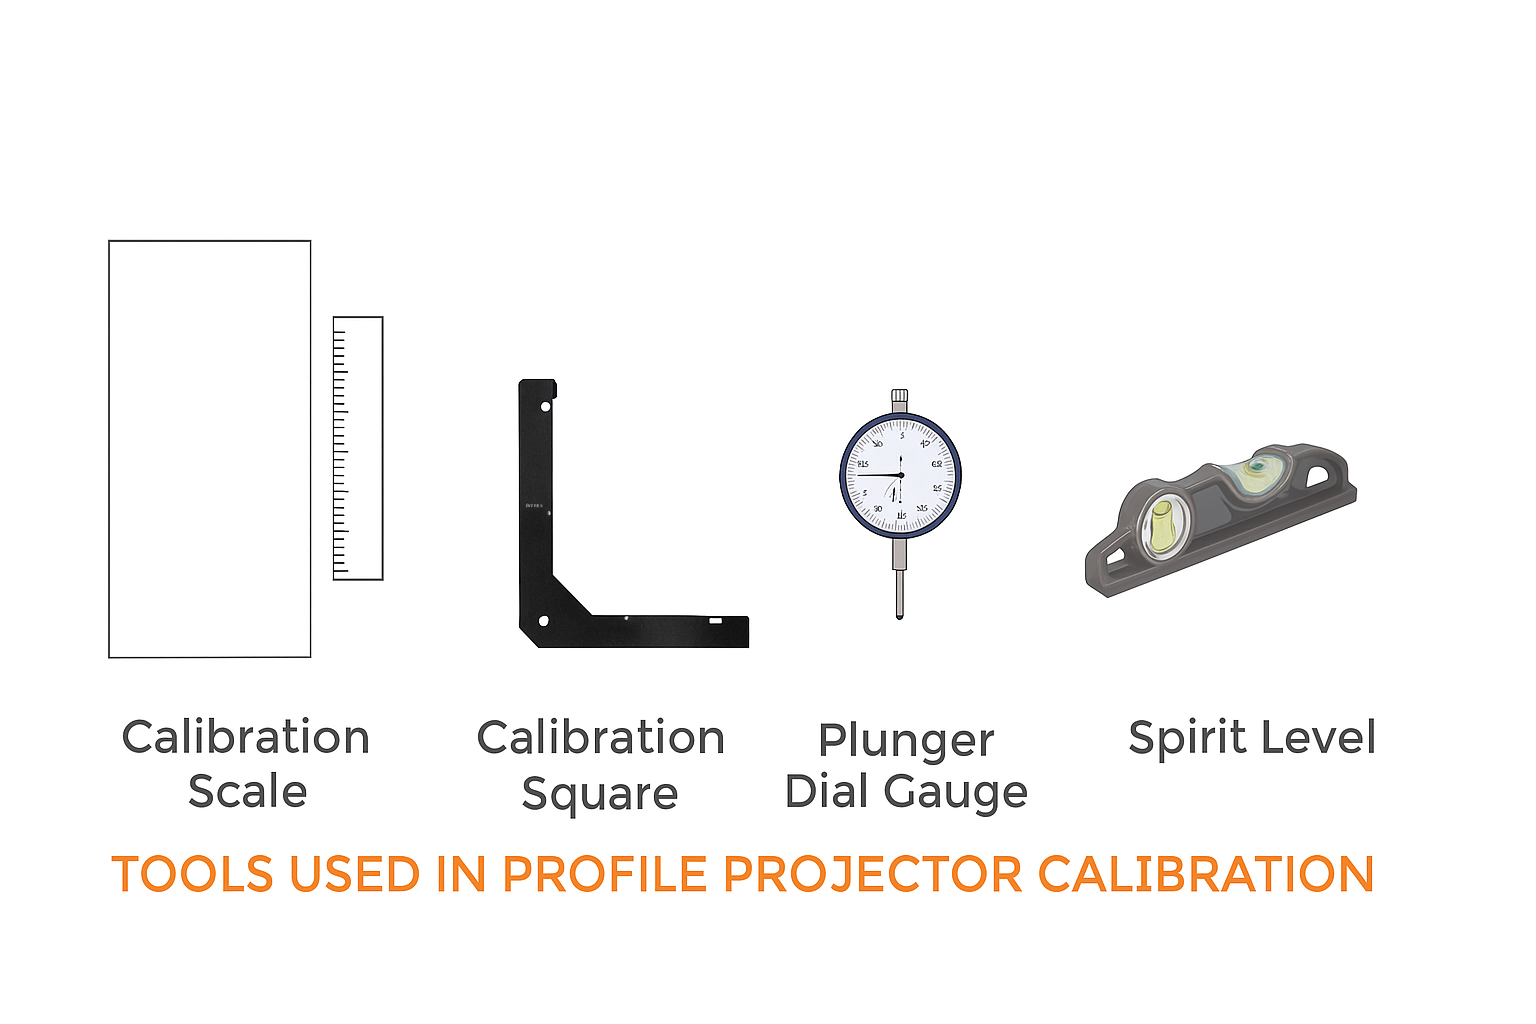
Repeated use of Profile projectors over time can make the system go out of calibration. Therefore it is required to re-calibrate them every year. A typical calibration routine involves the following:
Schedule a 30-min Call with Our Expert
This free guide uncovers 17 secrets that no Profile Projector manufacturer would dare tell you. You will receive this guide post your call with our expert.

Frequently Asked Questions
A profile projector is a non-contact optical device that magnifies and projects the contour of a part onto a screen for precise measurement and inspection. Using a light source, lenses, and mirrors, Profile projector displays an enlarged image for accurate evaluation of dimensions, angles, and shapes. Profile projector is widely used in manufacturing and quality control, ensuring components meet exact specifications with micron-level accuracy.
A digital profile projector is used to inspect and measure the dimensions and shapes of various objects. Its benefits include accurate measurements, faster inspection times, ability to overlay CAD drawings for comparison, and reduction in human error during inspection.
To identify verified profile projector manufacturers, look for certifications like ISO standards, check customer reviews and ratings, verify their industry experience and reputation, and ensure they provide warranties and after-sales support.
The profile projector price ranges from ₹90,000 to ₹35,00,000 in India. The equipment cost depends on the brand, model, and specifications.
To buy profile projector from a genuine manufacturer there are many suppliers and traders in the industry which provide cheap low- quality products. But we always recommend the customer purchase profile projector which can adhere to ISO, JIs standards etc. These instruments must be purchased only from a genuine manufacturer which provides prompt service and has a dedicated service team.
To receive a quote from Sipcon Technologies, just fill out the form with your requirements. Their sales team will call you back. You can also reach them at +91 82229 29966 or email info@sipconinstrument.com anytime.
We’ll guide you to the ideal system
Custom Quotes, Detailed Specs, or Pricing.